Beetroot and carrot payasam (carrot kheer with a beet-twist)

Because I dared to put veggies in payasam (kheer)

Some days you have a flash of nostalgia from so far back in your childhood that you wonder if your memory is playing tricks with you. Did that really happen, or are you imagining it all? But the details are so vivid, the little nuances so stark, it leaves little doubt. Some days, the present creates an almost exact re-enactment of what once was, and memories come rushing back. Little snapshots suspended in a time long gone draw closer, trickling in to your mind again, till you can almost see them as they once were.

I’m still basking in the new-found joy of having wonderful neighbours and living in a lane full of homes stacked close. I step out every morning to water the few pots in my balcony, and invariably wave to someone across the street. My next door neighbour is almost always on her balcony at that time of morning and never hesitates to call my name and say hi with a big, cheery smile. It makes for a great start to my day. One morning last week, I stumbled out, going about the same cycle of motions, eyes half closed with a bucket of water in my hands, when I heard my name. In an instant, I was transported back almost 25 years ago, to the when I was still in my nappies and we (my parents and I) lived in a tiny one bedroom outhouse at the back of a bigger home somewhere in Serpentine Road, Bangalore, and I practically started and ended every day in my neighbours home.

It was a time where neighbours were family, our support system and an extension of our own home and lives. I lived in their home, ate there, showered there, napped there and I’m positive a large part of my foodie streak also developed there. Meera Aunty, who was on several instances mistaken to be my mother (given the frequency with which I was spotted in her arms, or in her home, or being fed by her) made the tangiest tastiest saaru I have had to date, the best kumbalakai sambar (with peanuts!), the yummiest gojju that would make my salivary glands do a backflip!

They say you’re too young to remember much from that long ago in your own life, but I have some strong food memories of those first 2-3 years. I can see it all like it happened just yesterday. Running across at mealtimes, in my underpants and a vest, Bata chappals thrown on. Placing my bum on a cold steel stool by her dining table, eating out of big steel plates with compartments. Relishing the grainy texture of puliyogare, spooning fragrant ghee all over my food and mixing rice and sambar with my fingers, picking out the pieces of pumpkin so I could save the best for the last, sometimes eating just palya out of a katori until the rest of the lunch was prepared. I’m pretty sure my love for veggies started there, and has held me in good stead ever since.

Perhaps the strongest memory of them all is waking up in my home to the aroma of ghee roasting up sooji, or besan. That distinct warm toastiness of grain and ghee, mixed with a hint of cardamom or toasting nuts was enough to tell me that Meera Aunty was making something sweet, and I’d rush out into our backyard and call out to her. In seconds her smiling face would poke out of the balcony next door, to confirm that she was indeed making “goddi” (my childspeak for something sweet).DSC_0025I didn’t need to ever ask if I could go over. Her doors were always open to me, the boundaries blurry and food on her table always in excess, anticipating my unannounced arrival. So its no wonder that on the day last week when my neighbour called out to me, and memories of 25 years ago flashed through my mind, I wanted to replicate that same warmth that homemade sweets brought to my life back then.

One of the loveliest payasams Meera Aunty made was a carrot payasam. An intriguing pinky-orange colour, it was best enjoyed warm, with a dollop of ghee to make if glide down your throat. Dotted with ghee-roasted nuts, sometimes a raisin here and there, and a slight trace of badam essence, I could almost feel the flavours falling into place in my mind.

It’s funny how food can do that. Bring people, events and memories back to your mind. Help you recreate recipes in your kitchen, no matter that you were in your chaddies when said event occurred, and there was no way that you could fathom the concept of cooking back then.

So here is my take on the carrot kheer. Of course I had to add a twist to it, so I threw in some beets too. The recipe is probably not similar to the one she uses, but the inspiration comes from the warmth of her kitchen and all the memories she helped stack up. It definitely recreated that same feeling for me!DSC_0046What I used
1 cup chopped carrots and beetroots2-3 cups milk
1/4 cup jaggery (I used the dark, Goan kind, but you can substitute it with sugar too)
1 tablespoon badams (almonds)
1 tablespoon cashew nuts
A pinch of saffron
A pinch of cardamom powder
1 teaspoon ghee

How I made it

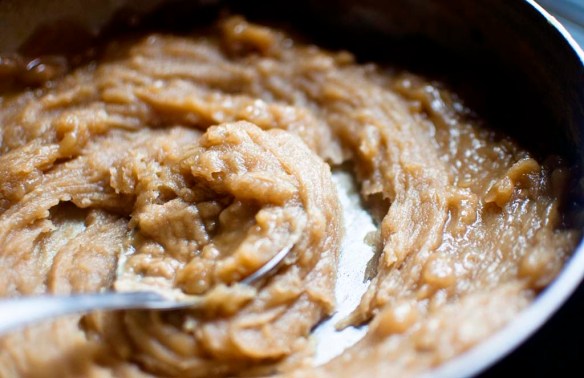
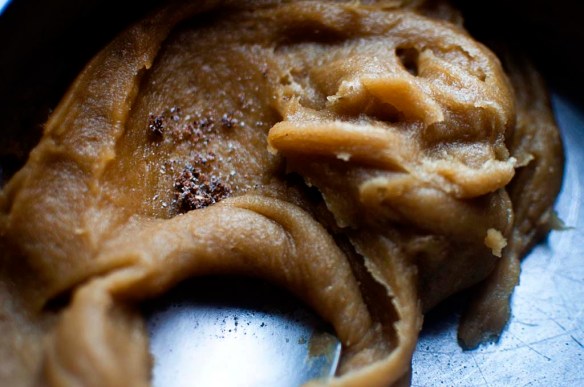
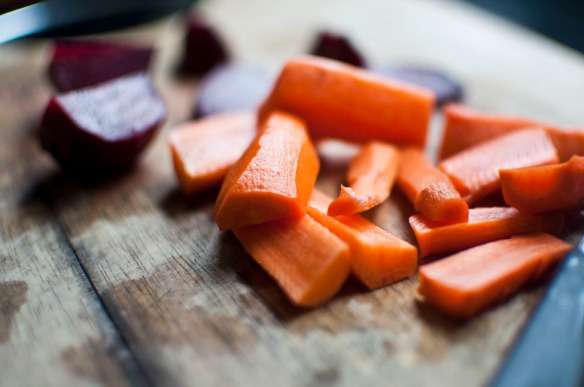
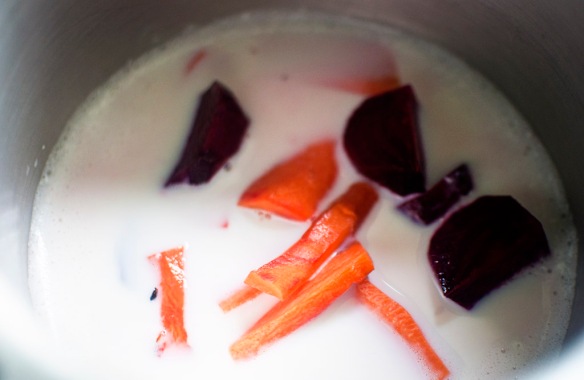
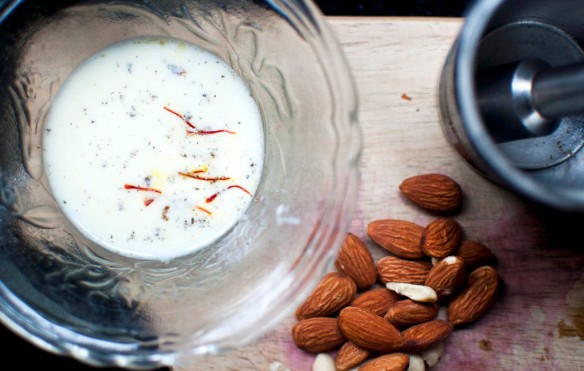
I chopped the veggies up first.DSC_0018Then I measured out 1 1/2 cups of milk into my pressure cooker.DSC_0021 I dunked the veggies into the milk and pressure cooked it for a couple of whistles. This only took 2-3 whistles in my case because I was using a small quantity of veggies.DSC_0024I warmed (not boiled) the remaining milk and took it off the flame. I measured out the jaggery and dissolved it into the milk.DSC_0023In a few tablespoons of warm milk, I soaked the saffron and cardamom powder.DSC_0028When the pressure from the cooker had released, I poured the contents into my mixer, added in the half the nuts and pulsed it to a paste.DSC_0033DSC_0034I tipped the paste into the remainder of the warm milk and stirred it till it was smooth and well incorporated.  The nuts gives the payasam some grain and thickness so it is important to make sure it dissolves.DSC_0036Next, I added in the saffron milk.DSC_0039In a small frying pan, I added the teaspoon of ghee and fried up the leftover nuts till they were golden and tipped them into the kheer and mixed it all up.DSC_0042DSC_0043Done!DSC_0052I like to have this payasam warm and I would suggest you try it that way too. It has the natural sweetness of carrots and beets, bolstered by the jaggery and laced with the saffron, nuts, cardamom and ghee.
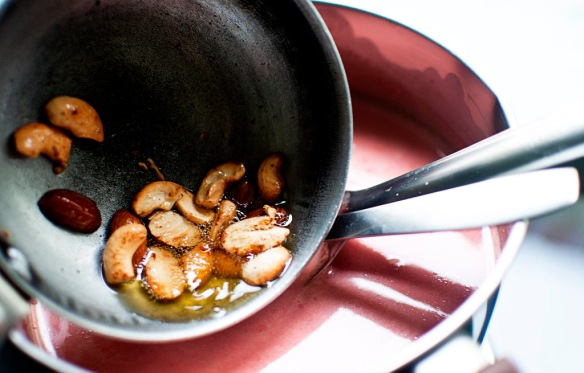
The husband, who isn’t the biggest fan of veggies and kheer separately, walloped a couple of bowls full of this.

DSC_0053The flavours felt familiar, but apart from the fond childhood memories it evoked, I couldn’t quite put a finger on what exactly it reminded me of, until the husband piped up, “It’s like a liquidised, deconstructed version of gajar ka halwa!”DSC_0044I think that was a pretty apt description!

Layered chicken biryani

Of finding foodie-friends and discovering new loves

There was a time soon after we had moved to Goa, when I felt like it would take a lifetime to build a support system, make friends and find our feet in a social structure of some kind. After living in Bangalore all our lives, where we were perpetually surrounded by friends, family, loved (and unloved) ones, Goa posed a new sense of isolation, of having to start from scratch and build that same cocoon of familiarity and warmth, from scratch.

I was lucky that work brought me closer to people, that I met so many like-minded young boys and girls, that their families became ours, that meeting socially almost always meant including everyone and their significant others. But probably one of the best things to have happened was the discovery that most others share this mad obsession for good food, and the willingness to try new things, learn together, experiment, cook large batches of said experiments and unleash them on the rest of the unsuspecting folks.

Just under 6 months ago, I met Yashu when she had just moved here from Bangalore to join her husband. In no time at all  our conversation veered to things like keeping grains and pulses bug-free, figuring out the right jugaad to make perfect idlis and dosas with Goan rice, and nostalgic (also laced with a tinge of regret) cravings for Bangalore’s crispy, crunchy fried delicacies — chaklis, murukkus, mixture and the like. I knew at once that I had made a foodie-friend of a special kind. It’s not every day that you can meet a stranger and strike up conversation about the things you otherwise only dream about in idle moments with yourself. Pretty soon we were meeting every now and then to cook up a storm and demolish our creations too. Medu vadas to go with idlis, fish curry and fried fish, chaat from scratch — we always managed to pick things that interested us both and that we could unlock a new level of achievement with! Frying up a perfect medu vada, complete with the donut like hole in the centre was the most gleeful moment of that weekend! Figuring out chaat from scratch, right from sourcing the various puris to making the individual condiments and assembling it at home was just as satisfying an experience. Which is why it was no surprise that when I ate Yashu’s dum biryani at a dinner she hosted, I was able to badger her to make it once again in my kitchen so I could learn how to do it myself and blog about it.

It takes a foodie to know the joy another foodie gets from simple things like finally figuring out how to make Dum Biryani. And she willingly obliged, much the same way as she does when I ask if she wants to catch the latest crappy Hindi movie nobody else wants to watch, or when I ask if I can stay with her when VC travels on work, or when I call her on rainy evenings and ask if she wants to have chai together. Pat comes the answer, “of course!” and in no time at all I would land up at her place with a handful of mirchi-bajji’s wrapped in a square of newspaper, hurriedly picked up from the roadside cart just outside her home.

I always thought Dum Biryani had an overly complex process to it, but Yashu’s recipe is fairly simple. It is essentially curry and rice made separately, layered in a non stick vessel and cooked together for the flavours to blend. The ingredient list may seem long, but it is made even easier if you have everything on hand. It also helps that the process falls neatly into 3 chunks: 1) marinading the meat 2) chopping onions and tomatoes 3) cooking the gravy and rice 4) layering it all up. It isn’t laborious, just a systematic progression from one step to the next. And if you are a foodie obsessed with taking up a small challenge, like Yashu and I often are, this one makes the perfect Sunday lunch. For those days when all you want to do is spend your morning in the kitchen, losing track of time, getting enveloped in the aromas of sizzling spices and buttery rice, and dishing out a one-pot-wonder.

What we used
(Serves 4-5 people)

Chicken marinade for 300 gms chicken (boneless thighs chopped into big-ish pieces)
1/4 cup coriander leaves
3-4 green chillies (reduce or increase depending on how hot you want it to be)
2-3 dry red chillies
2 flat tablespoons of poppy seeds
2 flat tablespoons freshly made ginger-garlic paste
1/2 teaspoon turmeric
1 teaspoon whole jeera/cumin seeds
3 pods of whole cardamom
3-4 pods of clove
1 piece star anise (optional)
1″ stick of cinnamon
1/4 cup + a few more tablespoons of freshly ground coconut

Rice
2 cups of basmati rice
1/2″ stick cinnamon
2-3 pods clove
2 pods cardamom
1 large bay leaf
1/2 teaspoon salt
2 teaspoons ghee
3 cups water

Chicken gravy
3-4 large onions chopped finely
3-4 medium tomatoes chopped small
1/2″ stick cinnamon
2 pods cardamom
2 pods clove
3-4 black peppercorns
1 bay leaf
1 1/2 teaspoons coriander powder
1 1/2 teaspoons garam masala
1 teaspoon Everest chicken masala
1 1/2 teaspoon Everest Kitchen King

How we made it

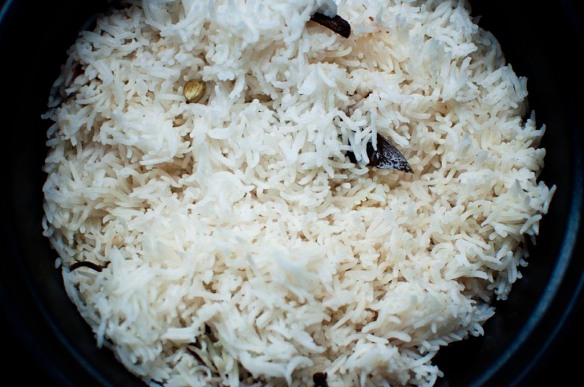
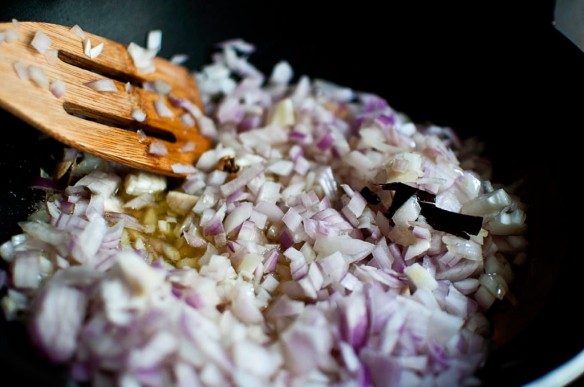
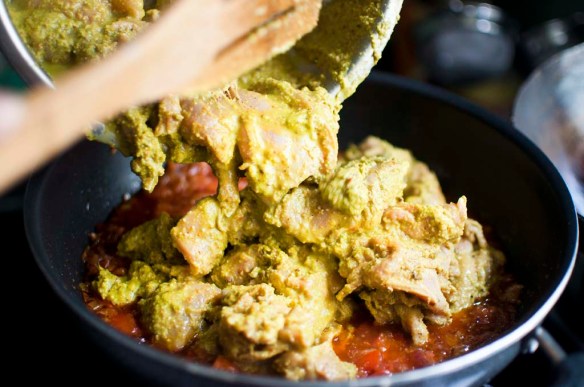
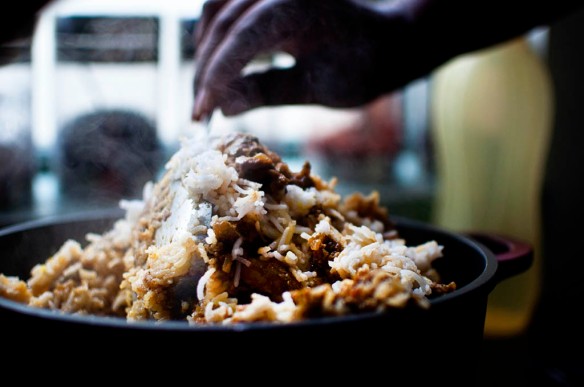
1) First of all, I ground up all the in ingredients listed under chicken marinade, without any water, and mixed the chicken with it. I let this marinade for 3-4 hours, anything more is an added bonus.DSC_00622) I used my electric rice cooker for this because I love how it cooks the rice perfectly without turning clumpy. I washed up the rice well, added in the ghee and mixed it well with my fingers. To this I added in the whole spices and a dash of salt. Then I poured in the water and turned the cooker on to do its thing.DSC_00873) Yashu arrived in time to help make the gravy, for which we heated up a significant amount of oil + ghee (equal quantities, as per your discretion, I would just say don’t skimp!) and added in the onions, whole spices (cinnamon, cardamom, cloves, pepper, bay leaf) and tossed them around till the onions were light brown and had melted down significantly.DSC_0055Next we added in the spice powders — coriander and garam masala first, followed by the chicken masala and Kitchen King. You can very easily omit the chicken masala and up the garam masala if you wish. Or substitute the Kitchen King with a biryani masala if you have that handy. I have gotten pretty addicted to Kitchen King, and add a touch of it like magic masala, to most things!DSC_0057The masalas were tossed around till they cooked down and the oil began to separate a little. Then, in went the tomatoes and a dash of salt to cook them down to a mush.DSC_0058When the tomatoes were almost totally mushy and the masalas were fragrant, we tipped in the marinated chicken and mixed it all up.DSC_0061DSC_0069I didn’t need to add any water, as the chicken releases a fair bit, and we let it bubble away (on sim) till the chicken was cooked. This also helped reduce the water content a fair bit, since we left the pan open while it simmered, so in about 20 minutes the gravy was thick and glossy.DSC_0074At this point you can taste for salt and spice and add a little red chilli powder if you don’t find it hot enough. Remember that once you layer it up with rice, the spices are slightly masked, so its okay to have the curry spicier than normal.

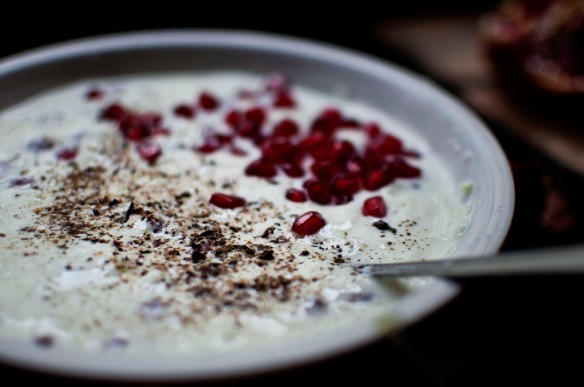
While the chicken was cooking away, Yashu chopped up the mint. If you’re super-duper meticulous like she is, you can test your Carpal muscles and use a scissor.DSC_0077 DSC_0079But if you’re a normal, lazy person like me, a knife will do just fine! She them sprinkled the mint over the curry, mixed well and turned the flame off in a couple of minutes.DSC_00804) Assembly! I warmed up 1/4 cup of milk and soaked a few strands of saffron in it. When we were ready to layer-up, we lined a large thick-bottomed, non-stick dish with ghee, then a layer of rice, taking care not to mush-up the grains.DSC_0085 DSC_0091Then we poured in some saffron milk.DSC_0095Followed  by a generous layer of chicken curry.DSC_0098Repeat the process (rice-saffron-chicken curry) till you run out of everything. There is no set rule about what the last layer should be, but ending with rice seemed like a good idea.DSC_0100Then we shut the lid and placed the pot on a thick, cast-iron tawa and let it steam for about 20 minutes more, until the flavours blend.DSC_0108When the biryani was done, we turned the flame off and let it sit for a while. You can either serve it up just is, or roughly mix the layers up like we did, so the curry is evenly distributed.Biryani1Serve up with raita. We made a simple mix of grated cucumber, grated onions and pomegranate seeds, with salt, pepper and chaat masala.DSC_0110 DSC_0111Done!

This was one much-talked-about, much-discussed and much-anticipated kitchen experiment and I’m glad I found an equally enthusiastic foodie friend to share the experience with. No challenge is too hard for her, and no simple preparation too small either. When it comes to cooking up something together, Yashu is always game. But you don’t have to wait for the prefect cooking partner to try this one. Make it, even if you’re cooking just for two. Reduce quantities, and you should still have a yummy, fragrant meal of meat, rice and if you serve it up with a simple raita and you’re going to come out feeling like India’s answer to Nigella.

Well, almost.

Spicy sprouted moong sabji

Or what could very well be a fitting comeback

So here’s the deal. I’ve been away for too long. So long, that it almost feels weirdly new to be back, typing in this window. I’m a tad disoriented because for one, the Worpress fonts have changed while I was away and now things feel awkward. But that’s not all that’s changed in the interim. We moved homes, I took forever to settle in, the kitchen though functional is still a little incomplete, my oven hasn’t found a spot as yet. As if all that newness was not unsettling and overwhelming enough, I decided to replace a large part of my kitchen ware with new things. Old, pans and kadhais with an almost non-existent teflon coating have been exchanged for spanking new non-stick ware, pans, pots, new storage dabbas for my staples and masalas, and a gleaming new green kitchen, with AWESOME photography-friendly light all through the day. All of it warranted a stylish return. A comeback with a bang.

I racked my brain and ideas for kheema (since I’ve made it twice since moving homes), a new and inspired cake (because I was struggling to get my baking mojo back) and a mushroom and cheese tart (because it’s been lingering around at the back of my head for a while now) and healthy cookies (because I have never made cookies!) swam through my head in tempting, tantalising swirls. Just enough to whet my appetite to maybe cook and eat, but not enough to manage the shooting pictures and blogging part of it. Not just yet.

That something’s-still-missing feeling lingered around for a while and I wasn’t sure what my special something for the special comeback would be.

To make things worse, I only just sat and went through my feedly updates yesterday. All 267 of them. Yes, phew. And it didn’t help that blogosphere is seriously killing it with fresh summery produce, juice tomatoes bursting with flavour, stone fruit everywhere, in tarts, in pies, galettes, sangrias, tarts, summery brunch food, omg-whatsgoingonnn! I’ve been away a little over two weeks, and things have apparently gotten very fancy in these parts! I was beyond overwhelmed. How does poor old me, with half a set-up kitchen and carpenters still crawling about the house keep up with that lineup? The bar has been raised so darned high, a wave of fear mixed with a healthy dose of inadequacy swept over me and I wanted to just shut the browser and forget all about that growing itch in the back of my mind. The itch to come here and blog.

So I did. I shut the browser. I shut down the laptop. I went to sleep.

And when I woke up this morning, something odd happened. I pulled out half a bag of sprouted moong from my fridge, and planned to make it for lunch. I decided I was going to spice up a plain old sabji. And I decided I was going to blog it. So what if it’s just moong? So what if it’s just sabji? So what if my kitchen is far from done? So what if Parmesh and Nilesh Carpenters are always too close for comfort, emerging into the kitchen right when I am bent oddly over a pot of dal? So what if things are not as perfect as I want them to be? SO WHAT?DSC_0254-editI suddenly remembered that this blog was always meant to be about the simple things. Homely things. Unfussy. Uncomplicated food. And even a comeback after an abnormally long hiatus didn’t warrant something fancy. So here is my uncomplicated comeback.DSC_0293-editJust the way I should have originally aimed for it to be. Simple. Homely. Honest.

What I used
1.5 cups of sprouted moong
1 cup finely chopped onions (I used 1 very large onion)
1/4-1/2 cup chopped tomato
3 pods of garlic, minced fine
1 slit green chilli (optional)
A dash of turmeric
1/2 teaspoon red chilli powder
1/4 teaspoon cumin/jeera powder
1/4 teaspoon coriander powder
1 teaspoon chicken masala (or just use garam masala like a normal non-chicken-masala-obsessed person)
Salt to taste
Juice of half a lime
Lots of freshly chopped coriander

How I made it

The original version of this sabji is a common one in my home. It is usually made with a light tadka of jeera, asafetida and sauteed onions. Sometimes garlic is added, but the masalas are usually just haldi and red chilli powder. In recent times I’ve started adding a tomato for some added juicy tanginess, and enhanced the flavours with chicken masala and jeera and coriander powders.

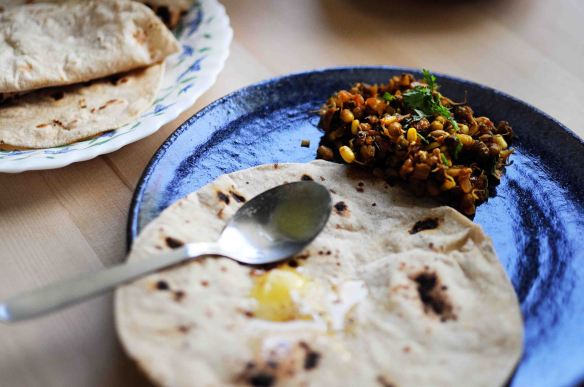
First I chopped up the onions and tomatoes.DSC_0255-editThen, in a pan I heated some oil, threw in the green chilli and garlic and let it sizzle till the garlic was browned a fair bit.DSC_0260-editThen I added in the onions, sauteed them a bit, added a dash of salt and let them sweat down. Next, I added in the turmeric and red chilli powder.DSC_0266-editWhen the onions had browned and the masalas didn’t smell raw any longer, I threw in the tomatoes and let them get mushy, all the while tossing on a medium flame. Then I threw in the sprouted moong.DSC_0268-editNext in went some more salt, the jeera and coriander powder and I gave it a good mix.DSC_0270-editI needed to cook the moong till it was soft, so I threw in about 1/4 cup of water, mixed well and let the sabji cook, covered.DSC_0276-editWhen the moong had softened (I checked by pinching one between my fingers. It should be cooked soft, but not mushy) I took the lid off and added in the chicken masala.DSC_0278-editI then turned the heat up and let it stew, so the flavours blended in and the water dried out. When the sabji was dry enough, I squeezed in the lime and topped it up with coriander.DSC_0285-editDone!DSC_0288-editI served it up with hot phulkas.DSC_0286-editLaced with a dollop of ghee.DSC_0287-editTold ya, didn’t I? Simple. Homely. Honest.

Some times, it’s okay to be improvise, add a touch of red chilli, a heaping teaspoon of chicken masala. Yes, even to moong. It’s called adjusting, making the best of what you have. And some times it means making peace with imperfection. Just like my kitchen. Like the not-so-traditional moong sabji. And everything else that was keeping me from blogging.

Now that the block is out of the way, the sabji has been made and devoured, tell me, what have you been up to while I was away?

Tomato masala rice (to use up leftovers!)

In which I unlock a new level of domesticity

Growing up, I always wondered about my mothers obsession with finishing up food at every meal. By the end, she’d be begging us to wipe off the last tablespoon of dal, or the few shreds of sabji that remained. But invariably they got packed off into smaller containers and put into the fridge.

I couldn’t understand the delight on her face, when she looked at vessels at the end of every meal, to see the insides reflect her beaming face back at her. I didn’t get it, and I passed it off as just another mother-thing I would never understand. Until of course I experienced the same glee when I started cooking myself. I think I have successfully unlocked a new level of domesticity, because now I know exactly what my mother felt. The pain of putting away tiny smidgens of leftovers, and the glee of seeing food finish right before your eyes!

There are few things that bring more joy than watching the meal you have cooked get wiped off clean, so you have no leftovers to carry over. But the one thing that makes me even happier than empty vessels at the end of a meal, is a nifty way to use up leftovers. Because let’s face it, we all have them more often than not.

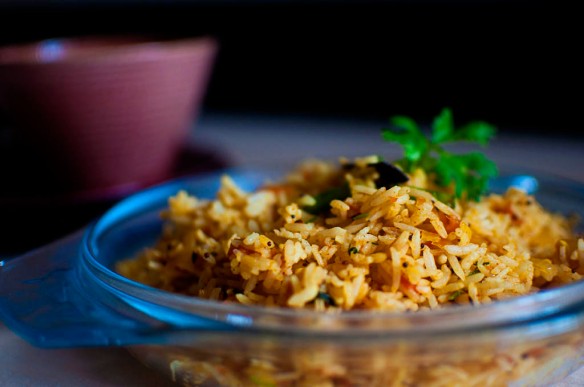
So last week, when I opened my fridge to find a vessel full of basmati rice from the previous night, I decided to whip up some tomato rice with it.DSC_0068There is a traditional recipe for it, tomato bhaath, as it is called down South. But I didn’t want to venture there. I went with my instinct and threw in some spices and it turned out fabulous. Not overly spiced, heavy on the tanginess of tomatoes and a dash of lime but just flavourful and perfectly fragrant. Just the kind of lovely outcome to get from leftovers.

And guess what? It was wiped clean!

What I used
For 1 cup of rice, enough to feed 2-3 people
3 medium tomatoes chopped into small chunks
1 medium tomato sliced thinly
2 small pods of garlic and 1 small piece of ginger minced/grated
1 green chilli
1 generous fistful of coriander leaves chopped finely
1 teaspoon mustard seeds
1 teaspoon cumin seeds
1″ piece of cinnamon
2 pods of elaichi
4-5 black peppercorns
A pinch turmeric
1 teaspoon red chilli powder
1 1/2 – 2 teaspoon Everest chicken masala/garam masala

How I made it

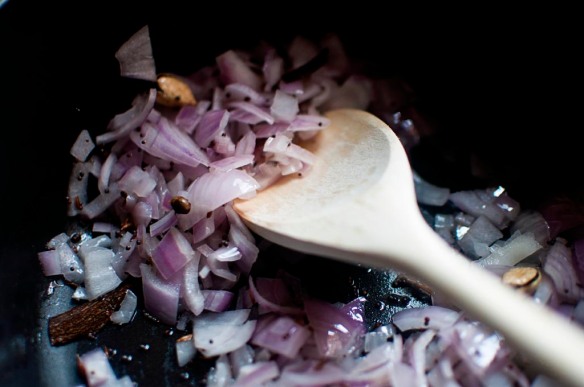
In some oil I sputtered the mustard seeds, cumin and threw in the onions. Then I added in the elaichi, cinnamon and peppercorns till they puffed up and got fragrant.DSC_0037Next in went the green chillies, garlic, ginger and I sauteed them till the onions wilted some more and the the raw smell vanished.DSC_0039Then I added in the tomatoes and a dash of salt to break them down. I sauteed them on a medium flame till they turned completely mushy and almost to a paste.DSC_0040Topped this with turmeric, chilli powder and continued to mix for a couple of minutes on a low flame. Lastly, I added the chicken masala and threw in the coriander leaves and sauted them some more.DSC_0047Next, I added in the cold rice, mixed well, tasted it for salt and adjusted it.DSC_0049The last step is to give it a big squeeze of lime and mix.DSC_0054Top with some more coriander and serve hot.DSC_0070Done!DSC_0059Notes:– This recipe works best with cold rice. So if you dont have leftover (day-old) rice on hand and you want to make a batch of rice to make this, make sure the rice is fully cooled before you mix it with the masala, or it will turn mushy.
– I have been habitually replacing garam masala with Everest Chicken Masala, in sabjies, curries and pulaos because the husband and I love the flavour it adds. Feel free to try it out or stick with garam masala.
– If you want, you could experiment with using fresh mint or dill, or even kasuri methi, instead of coriander, as a significant flavour comes from the greens.

Halwa (whole wheat and sugar-free)

Just what I needed after 30 hours of rain

We’re bang in the middle of the monsoon. The rains have hit us full force and it is the time of perpetually wet toes, a cold nose and wishing you could just stay indoors, curl up and watch the rain. But when it rains for upwards of 30-40 hours, staying indoors isn’t an option. Life goes on, as it does in Goa. People go to work, kids go to school, milkmen and poiwallahs continue to dutifully deliver their ware. And wives continue to pack hot lunches to deliver to their husbands. When it is especially wet and cold, they think up ways to bring back the warmth and comfort of home into an otherwise simple meal. And that’s just what I did.

I can’t take credit for conjuring this one up. It is a classic Indian halwa. A basic recipe that is versatile and used with many different grains. The good thing about the rain is the mood it brings in. It invokes a time of slowing down. And that has seen me rushing through several books, flopped in bed or curled up in the living room, gorging them one after the other. One such recent read was The F-Word, (a food-memoir by an Indian author!) that was my sisters birthday gift to me. The book is the kind of book I think I might write some day. Simple, home-made stories, interspersed with simple, homely recipes. Nothing fancy about it. But written well enough that it invokes a sense of urgency. To put the book down for a bit and try that halwa you just read about. And that’s just what I did.DSC_0063We had had upwards of 30 hours of non stop rain by then, and a bowl of warm halwa sounded so comforting. That it was whole wheat and sugar-free gave me an extra kick of course. This halwa is by no means “healthy” though. It is rich and just a single small bowl made me quite full.

What I used
Recipe liberally adapted from The F-Word, by Mita Kapur
1/4 cup ghee
1/2 cup wheat
3/4 cup water
1/2 cup jaggery syrup (see notes for what to do if you’re using chopped jaggery)
1 pod of cardamom, opened and powdered (the husband is not the biggest fan of cardamom, so I used just 1 pod. Add 2 for a more fragrant and spicy halwa)

How I made it

In a pan, I first melted the ghee.DSC_0042When it began to bubble very gently, I added in the wheat.DSC_0044Meanwhile I combined the jaggery syrup and water in a saucepan and set it on a low heat so it would meld together.

I then roasted the wheat continuously for 5-7 minutes till it smelled nutty and wonderful.DSC_0046By now the jaggery water was warm and uniformly mixed, so I poured it into the atta. It is important to turn the flame down at this point, because the wheat will sputter noisily and threaten to coagulate.DSC_0050With the flame still turned down, I swirled the mixture around, smoothing out the lumps.DSC_0051-1The mixture will thicken slowly, and continuous whisking in circles is essential. I kept at it, till the entire mixture came together into a luscious, silky, dough-like consistency. I then added in the cardamom.DSC_0054Mixed it well and topped it with chopped almond slivers lightly toasted in a bit of ghee.DSC_0061Done!DSC_0068Notes:
– Although using just whole wheat gave me a wonderfully smooth and soft halwa, I think mixing in a bit of sooji would add a little grain to it
– Next time I’m going to add in a mashed banana. My mother and grandmother often did that while making sooji halwa and the banana gets wonderfully caramelized and adds a little crunch with bits of burnt banana
– If you don’t have jaggery syrup handy, use 1/2 cup chopped/grated jaggery melted in 1 cup of water (do not add any more water)

Methi and coconut masala rice

Yet another one pot dish to save the day

If you have read this blog long enough, my love for rice is probably not unknown to you. My love for quick, one pot rice-based meals, even more so. I’m constantly trying out all sorts of permutations and combinations, throwing in whatever veggies I have and rustling up various versions of pulao. Because it is versatile, healthy, can be whipped up in no time. And it is a great way to clean our your fridge!

I don’t know about you, but those all those factors score major winning points in my mental cook-book. Especially on weeknights when I have pushed making dinner to the very last minute, my limbs are aching from another crazy Zumba lesson and my brain is shutting down from hunger. This is just the kind of meal I can throw-together in a jiffy, knowing that I really can’t go that wrong.

Sometimes, just by the way the spices sizzle and get aromatic, I can tell if the trial is going to be a good one or not, and my anticipation and excitement starts bubbling up, prematurely. I can hardly wait for the pressure cooker to then do its thing, and open up the lid to taste the results. Sometimes there are failures. Well, failures is probably a harsh word because how wrong can a simple concoction of Indian spices, veggies and rice, go? I have never had to trash a batch of pulao. To date. Though, that might have something to do with my unnatural, unwavering partiality towards all rice-based dishes.

But the truth is, even a not-so-great pulao (there is no such thing, if you ask me), gets passed off as “at least it is edible!” from me, while the husband looks on with that quintessential OMG-I-married-that-pulao-loving-freak look that he has now mastered to perfection. To him, pulao is just, well, masala and rice. And even the most subtle variations in spices and veggies or the huge outlandish twists and turns in a recipe are entirely lost on his oddly conditioned taste buds.

For him, pulao, like dal, evokes memories of plainness, of mundane weeknight dinners from his childhood. And I’m trying hard to get him to shake off his irrational bias. To get him to see that there are a gazillion unique ways to make a pulao, and most of them are yummy, some even, OMG, outstandingly delicious! Since I am nothing if not tirelessly determined (when it comes to pulao, at least!) I subject him to my experiments. Over and over and over.

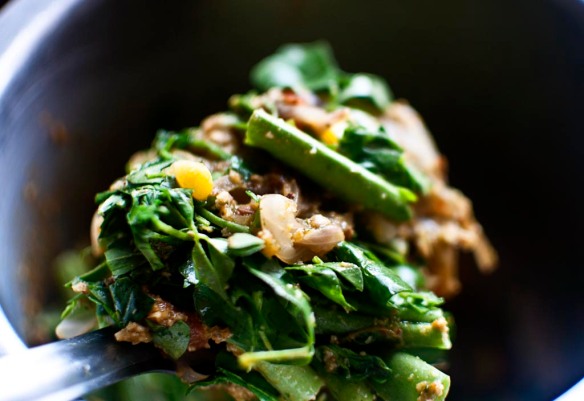
This is another attempt #67293, from the Pulao Diaries, so to speak. And the winner in this one is that it was made without any garlic or ginger! It was also a super-duper quick throw-together kind of meal that helped wipe out annoying odds and ends that were hanging around in my fridge.DSC_0018Isn’t that really the best kind of meal?

What I used
Recipe inspired by and adapted from here
1 cup basmati rice (you can use regular too)
2 cups chopped methi (you can use coriander, in the absence of methi, but ensure that you cut it to about 1/2 cup as coriander has a stronger flavour/aroma)
1 large (or 2 medium) tomato chopped to chunks
1 large onion sliced thin
1 tablespoon ghee
2 teaspoons jeera
Any other veggies (I used inch-long beans and fresh corn, you can use chopped potatoes, babycorn, fresh green peas, soy chunks, flat beans, etc)

Grind together:
2-3 tablespoons coconut
One handful coriander leaves
1 teaspoon red chilli powder
2 teaspoons garam masala (I used Everest chicken masala)

How I made it

You have to believe me when I say I literally threw this together, and it got made by itself! There are just a few steps to go through and then you just shut your pressure cooker and go fix your eyeballs on the beauty that is Harvey Specter. Okay, that’s what I did that day, you can go watch any mindless tripe, whatever your current TV-fix maybe.

Wash and pat dry the methi leaves and chop them up.DSC_0003Throw in the ingredients in the “grind together” list and make a fine paste.DSC_0004Heat the ghee in a pressure cooker/pan, add in the jeera and let it sputter. Next toss in the onions and saute until light brown.

Then, add tomatoes with a small dash of salt and cook them down, tossing continuously, until they turn mushy.

Add in the ground masala next and mix well. Continue to toss until the raw smell goes away and you begin to see the oil separate from it.

Add in the veggies a little more salt (as needed) and give it a good mix. DSC_0007Tip in the rice, a enough water for it to cook, mix it all up. Shut the lid and pressure cook until rice is cooked, but not mushy.DSC_0010Done!

We had the pulao with a spicy raita of cucumbers and finely chopped onions, as we always do. (This raita would pair excellently well with it too!) Some papad and pickle would have added a lovely touch, but the pulao itself was so flavourful, I don’t think we missed it.
DSC_0014
Make this, soon! Its perfect if you fancy the coconut+methi combination. Or if you are out of ideas and need to clean out your fridge. Or even if you want to make something quickly and go watch Harvey Specter finish up that long-pending assignment. Especially if you want to convince your pulao-hating husband that the humble pulao is one of the most versatile inventions of ghar ka khana.
A few notes:
– If you’re feeling adventurous and have some time on hand, some diced chunks of chicken marinated in curd, turmeric and a dash of chilli powder would be an excellent addition to this
– Feel free toe xperiment with other greens. Methi is what I had, and needed to finish quickly. If you have a successful experiment with palak/dill/coriander, please let me know!
– If this pulao hasn’t caught your fancy, you might also want to look at a few other pulaos around here; an easy (but bastardised) Goan veggie pulao, mint coriander and coconut milk pulao, methi corn and peas pulao, or a plain and simple veggie pulao (but I have to say, we’ve come a long long way from those shaky beginnings!)

What’s up

In which I don’t share a recipe, but lots of news instead

I’ve been itching to come here and type a few words, share some of the recipes I have stashed away, edit some pictures that have been pending for a week, and most of all do some cooking-shooting-blogging. Life has been hectic, with many changes bubbling beneath the surface. I just wrote a mammoth post about it here, giving updates and explanations for going missing in action.

It’s been over a week since I have posted anything here, and even though I have enough drafts to keep me going for a while, I’m longing to get back in to the normal flow of things. Of course meals are still being cooked at home. A girl and a boy still need their daily sustenance, but there just has been no time. Scratch that, mindspace, actually. To sit and document it. You know how they say when the going is good, things begin to snowball and roll into a frenzy? No, nobody really said that. I just made it up, because that’s how I feel.

What have I been up to?

Well I’ve been toying with the idea of selling cake! This might not be a surprise for those of you who already follow me on facebook, but the truth is I’ve moved from informally making cake for friends to believing them when they say they’d pay money to eat my bakes! Yeah, they asked for it. Now they’re going to have to pay me every time they ask for cake.

Imagining, building, writing, checking, designing, baking, shooting. Its been a hectic couple of weeks and things are finally shaping up. On the baking side itself, there has been orders, deliveries, recipe testing, tasting, tweaking, finalising, and it has kept myoven as busy as me!

It’s funny how when I was in the throes of miserable notice period blues and I was baking to save my life, and I nonchalantly said “If only someone would pay me to bake all these cakes,” I didn’t in my wildest dreams imagine I’d be doing it in some part, just 12 months down the line.

photo 3The going has been good, but for the whole story, you’re going to have to go on and read it there.

Beetroot raita

Pink murder on the kitchen floor

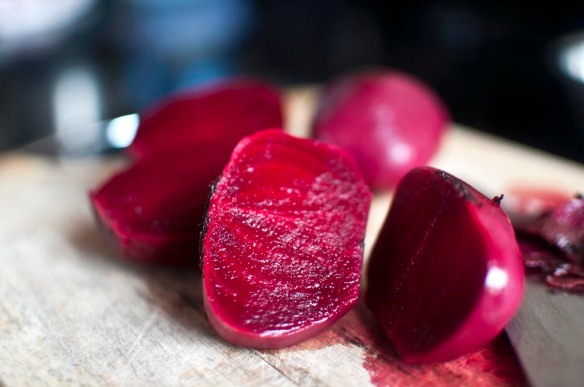
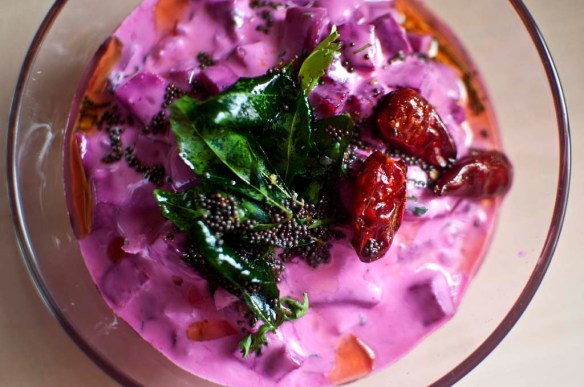
Despite my general fondness for veggies, there are a few things I tend to ignore. Beets, for one. I have no rational reason to avoid them. In fact I really love beets, but I find that whenever I cast my eyes on a pile of beetroots at the market, something about their muddy exterior and grubby, mottled skin makes me turn away. Forgetting completely that on the inside, the gorgeous pinky glossy finish almost always takes my breath away. So last week, I bought me some beetroots for a change.DSC_0023I usually make a typical Kannadiga palya, with a simple seasoning and shredded coconut, to top it off, but this time I turned to an old favourite that my mother makes. This beetroot raita is creamy, gloriously pink and typically goes well with pretty much anything. It helps that it is bright and beautiful, and makes an interesting side to perk up even the most average, simple meal.DSC_0059I am constantly innovating with curd-based dishes so as to get the husband to consume a basic amount of yoghurt on a daily basis. And this beetroot based innovation can now neatly go into the veggie-raita category!

On Monday, I took the beetroot raita to lunch with a bunch of new lady friends with whom Monday potluck is fast becoming a happy habit. When it was polished clean, and when the husband came home from work to tell me he loved it, I knew I had to post it here.

What I used
3 medium beetroots, pressure cooked till soft
1 small onion chopped fine (you can skip this if you are not fond of raw onions, I added it to bring in a crunchy texture as the beets go soft when pressure cooked)
Thick curd, whisked till creamy (not runny) with just a tiny dash of water
Salt to taste
Finely chopped coriander leaves
Coconut oil for tadka (can use any other, but I highly recommend coconut)
1 teaspoon mustard seeds
2 sprigs curry leaves
A dash of asafetida
3 small red chillies (or more, depending on your appetite for spice)

How I made it

I pressure cooked and cooled the beetroots first. When they were cool enough to handle, I chopped them into smallish squares.DSC_0027Then I whisked the curd, set it aside and chopped the onion too.DSC_0030I tipped the beetroot and onions into the curd and mixed them up and added salt to taste.DSC_0037In a small tadka pan, I warmed some coconut oil and added in mustard seeds, red chillies, curry leaves and asafetida in quick succession. Letting it crackle for a few minutes, I then tipped it into the raita.DSC_0052Mixed it up well and topped it with freshly chopped coriander.DSC_0061DSC_0049Done!DSC_0026

Mango madness, part 5: chopped mangoes on whole wheat pancakes

Goodbye King of Fruits, until next summer

Probably the best thing about the summer has been the amount of mangoes I have consumed this year. Both raw as well as ripe. We ate them like they were going out of style. Which technically they kind of are. Until summer brings them back again.

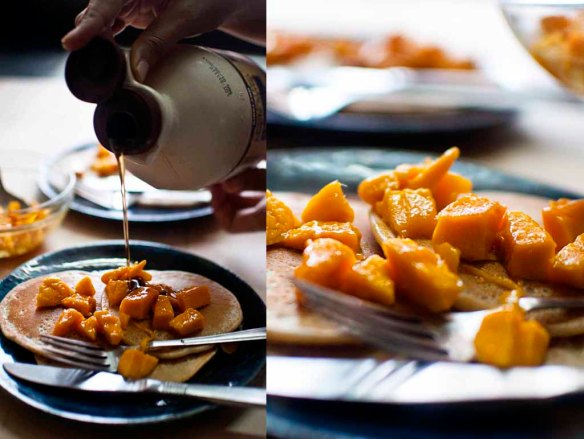
On the weekend, we decided to have them plain and simple, chopped and dropped over whole wheat pancakes. Its been a long time since I made pancakes and I was in the mood for a hot, hearty breakfast. The last time I made anything of the like was the crepes we had with strawberries and then with oranges. And since both crepes and pancakes pair wonderfully with any fresh fruit, it was an easy decision.DSC_0043We had our pancakes with a drizzle of maple syrup and lots of fruit. You could also use honey, jaggery syrup or even try the mango and lime compote, which I think would go so well. I always squeeze a hint of lime over the syrup, when I am having pancakes so I’m pretty sure the lime and mango would be a genius combination!
This is a good and simple way to use up mangoes if you’re still in the mood. Mango season has officially ended here in Panjim. I know, because the last lot I bought were horrendously expensive, and were just average in taste. So until next season, this is us saying adieu.

What we used
1 cup whole wheat flour
1-2 tablespoons sugar
1 teaspoon baking soda
1 teaspoon baking powder
1 1/4 cup milk
1 teaspoon vanilla extract
1 egg
2 tablespoons oil/melted butter (I used a neutral cooking oil)

How we made them

First I measured out the flour, added int he baking powder and baking soda to it.

Then, in a smaller bowl, I cracked an egg and whisked it. To it I added the oil, vanilla extract and whisked again. I then slowly drizzled the milk into it, while whisking continuously till it was fairly frothy.

I added the sugar to the flour, gave it a good mix and then added in the mix. At this point, feel free to add a little extra milk, a little bit at a time, if you feel the batter is not at the right consistency. Pancake batter should not be runny, or too thick, but should be easily pourable.

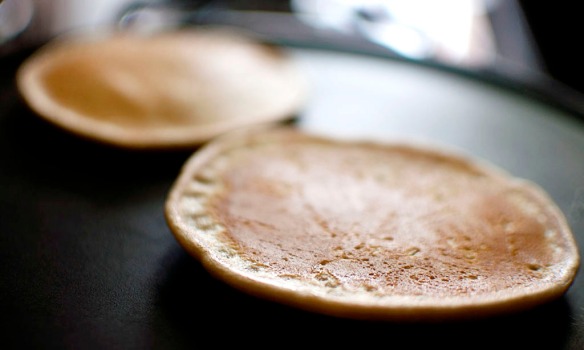
Then I lightly greased the tawa/griddle I had heated, turned the flame down to medium, and poured a ladle-full of it in the centre and let it spread a little.DSC_0047I let it cook, until the edges began to curl up, and then flipped it over. And repeated till we had enough pancakes between the two of us.DSC_0049Then I topped it with chopped mangoes.DSC_0055Followed by a drizzle of maple syrup.DSC_0064And we chowed it down.DSC_0068Done!DSC_0079Pretty, no?

DSC_0074I’m really sad to see the mangoes go, but this recipe would actually work well with any fresh fruit, so its definitely the last of the pancakes around here. But if you think that’s the last of all things fruity around here, have you seen what I have been up to lately?

Chocolate mini-tarts

Quick fix, pish-posh dessert

You know how sometimes you see something gorgeously sinful on the Interwebs, or you eat something that looks deceptively simple but ends up being super rich, and you want to immediately go home and make it yourself? Except you think about the effort and start making mental assumptions about the amount of butter and cream that might have gone into it and try and quickly convince yourself you’re better off without it. But all along, in the back of your head, that little seed of a thought is growing larger, louder and increasingly dissatisfied.

It happens to me, far too often. And the only saving grace is I am far too lazy spontaneous a baker to actually go through with recipes like that, to plan. But one rainy afternoon last week, I was at the cafe with Pooja and Roshan, when I took a bite of this beauty that was placed before me.tartImmediately decided I was going to make a chocolate tart over the weekend, even if it killed me. But the lazy baker in me thankfully swooped in just in time and took charge because I really couldn’t be bothered with making pastry and a mousse-y filling and what not.

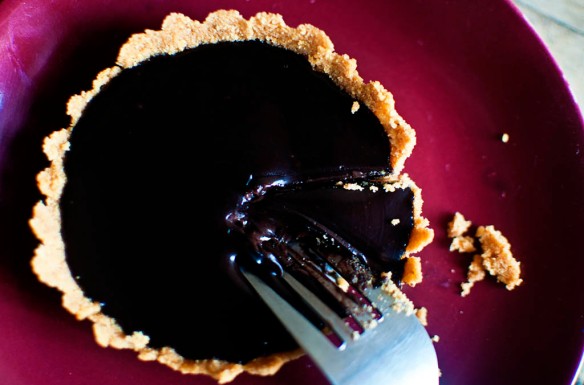
So I conjured up this quick-fix. This is not rocket science, I’m pretty sure this recipe exists in several other places on the Interwebs, so I can’t claim I created it. I did however imagine it, step-by-step in my head and then proceeded with growing surprise when things turned out as I imagined them and the result was a rather deceptively posh looking little tart, that actually took very little time and effort to make.DSC_0106The husband was chuffed, and ate his share as well as half of my share. Later that evening a couple of friends came over and asked about the tart I had posted a picture of on facebook. Of course I had to offer the rest of my half to them. And that was the end of it. Now I need to make this again and get my fill!

What I used
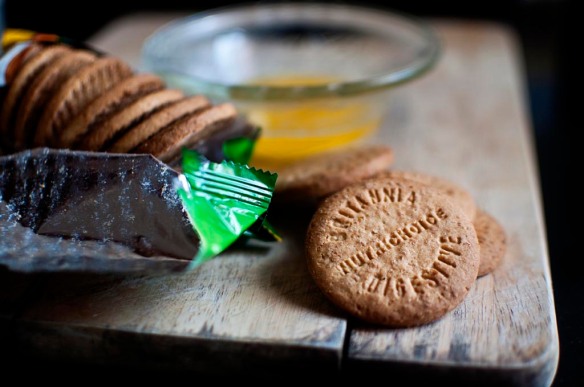
Makes 4 mini tarts. I used my sasta, tikau aluminium moulds that are about 2.5″ in diameter and have removable bottoms which made it very easyDSC_00271 packet (100 gms) digestive biscuits
3-4 tablespoons of butter melted in the microwave
1.5 packed cup finely chopped cooking chocolate
1/2-1 cup fresh cream (I eyeballed this quantity so I cant be sure, I’m sorry)

DSC_0003How I made them

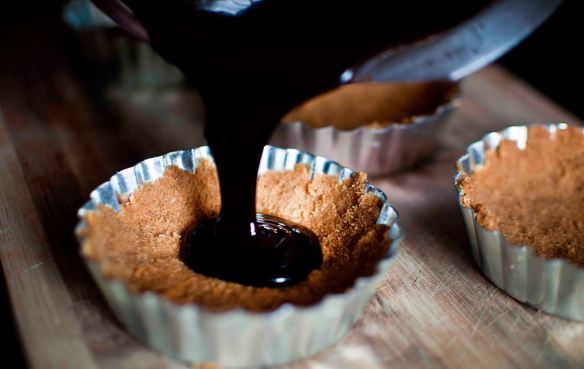
I pulsed the biscuits in the mixie till they were coarsely ground. Then I poured in the butter and pulsed it a couple of more times till it was combined.DSC_0005I set the oven to preheat at 170 degrees C for 15 minutes and while that happened I divided the buttery biscuit crumbs equally into the 4 moulds.DSC_0007Using my fingers I pressed the base into the moulds evenly and stuck them into the oven. I baked them for 10-12 minutes just so the base would get nice and toasty.DSC_0010Then I pulled them out and set them on a wire rack while I chopped up the chocolate and placed it in a bowl large enough to allow mixing of the ganache.DSC_0032In a saucepan, I warmed the cream till tiny bubbles began to appear on the surface. Then I poured the warm cream over the chopped chocolate.DSC_0047And gradually let the chocolate melt into the cream.DSC_0061Mixing gently, till it was one homogenous glossy mixture.DSC_0069The gorgeousness that is ganache was then poured equally into the 4 moulds.DSC_0078Every little bit of temptation to just gobble them up as they were, sitting pretty, shiny and gooey, were put to rest.DSC_0093I stuck the moulds into the fridge and sat on my hands for the next 3-4 hours (or as long as it might take to set).DSC_0090When I took them out, I gently un-moulded them one at a time and let the husband have his share. DSC_0100And some of mine too.DSC_0108 DSC_0111Its time to make this again. Because it was really that low on involvement. And because I want to add some fruit to it next time.

Notes:
– If you are a diehard chocoholic, use a denser variety of chocolate for the ganache
– A teaspoon of cocoa added to the biscuit base might give you ane xtra chocolate kick
– If you would like a thicker biscuit base, increase the number of biscuits by 4-5 and add a tablespoon of butter more
– Fruit would make a good topping with the chocolate with a dab of fresh cream, if you’re feeling indulgent
– The longer the tart stays in the fridge the more solidified the chocolate gets, so if you want it set, leave it in longer. For a softer tart, a few hours will do